Step 1 Add a new measurement
1-1. Access the LifeCare screen
Click LifeCare on the main screen
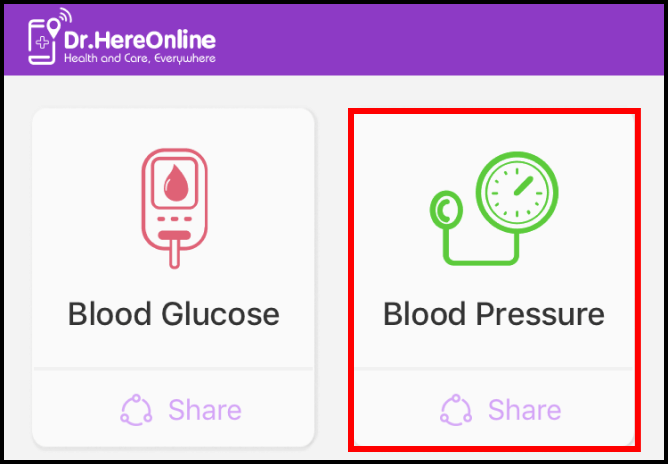
Access Blood Pressure to continue.

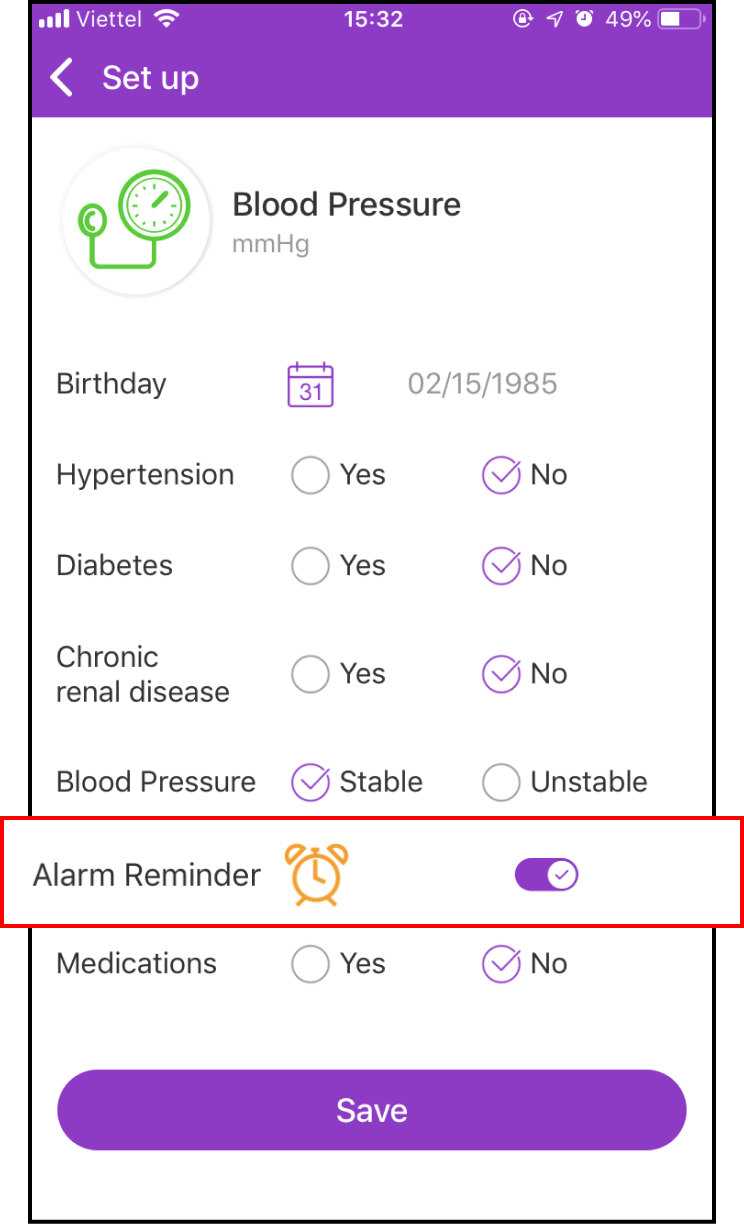
1-2. Set up your blood pressure measurement
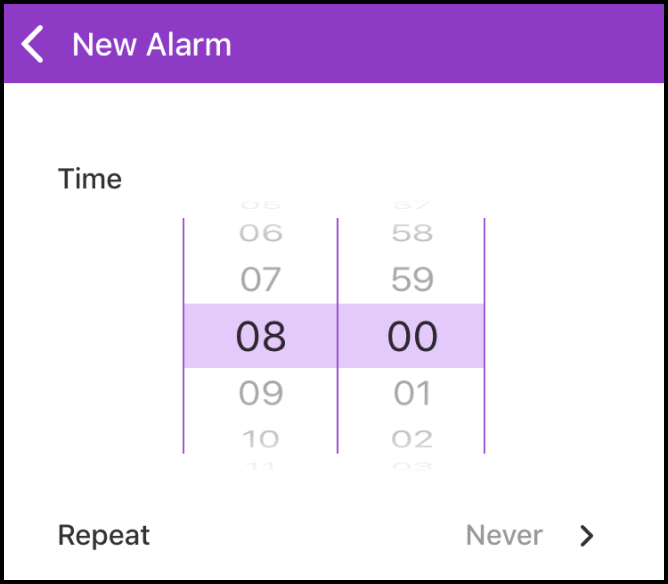
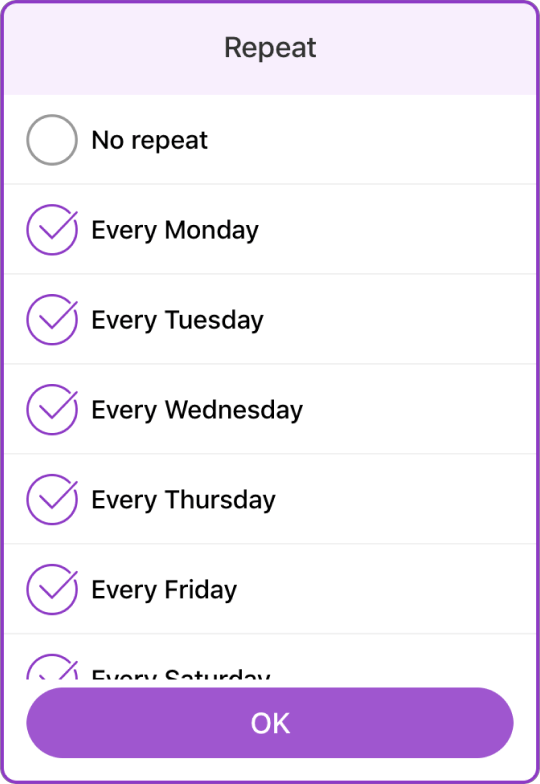
Fill in your medical history, medication use history, and set an alarm to remember your measurement schedule.
1-3. Start measuring new blood pressure data
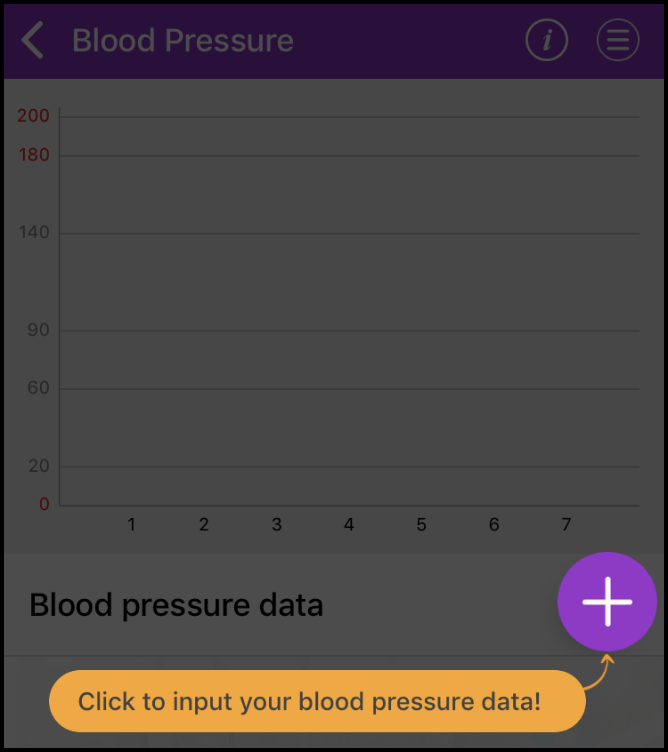
Return to the LifeCare screen, select Blood Pressure, and follow the instructions. Press the + sign to add a blood pressure value.

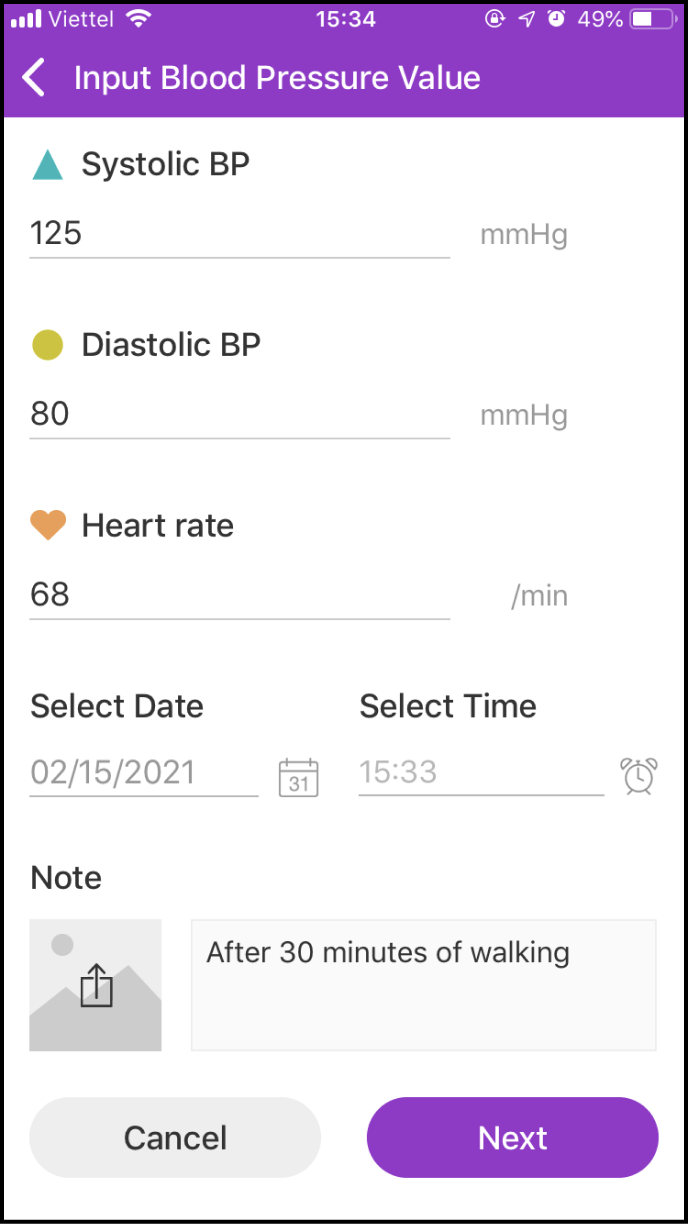
Enter the blood pressure value, measurement date and time, and indicate when to measure. You can also add notes and photos.
1-4 Save and view measurement data and expert advice
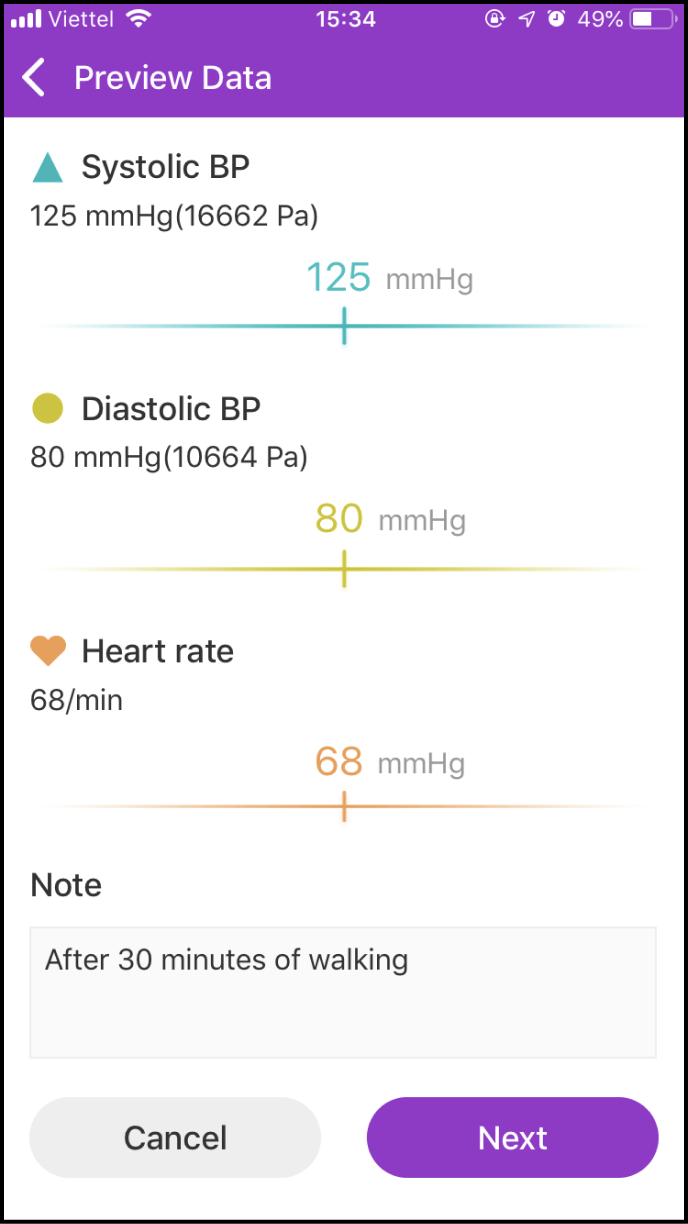
After entering your measured blood pressure value, click Next to access the preview screen to confirm all information before proceeding to the next screen.
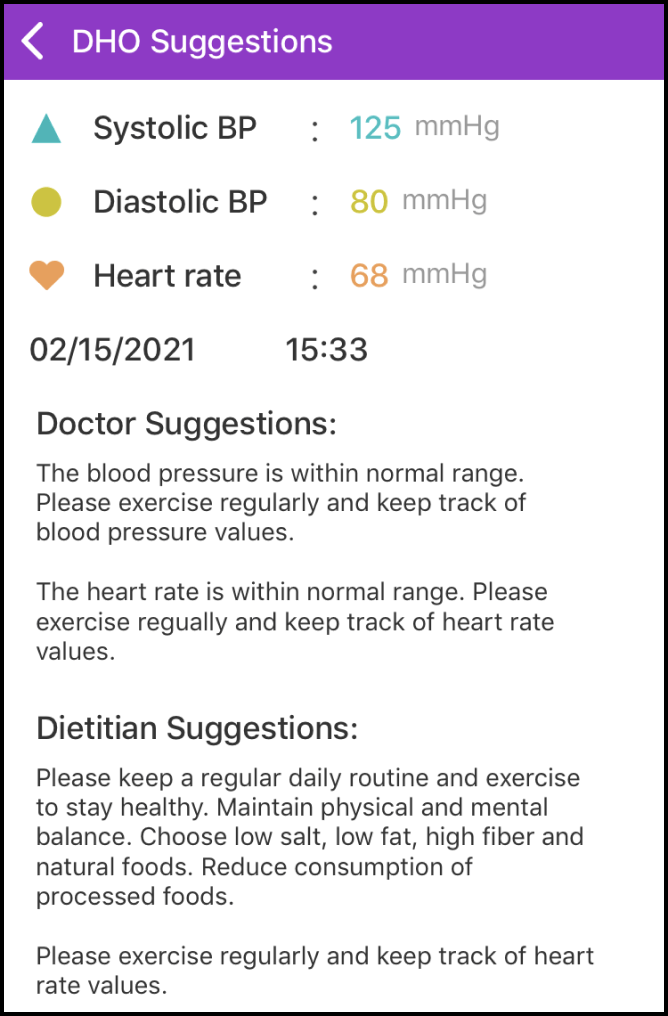
Once your information is saved successfully, you will receive health suggestions from Experts. Click Save.
Step 2 View your blood pressure history
2-1. Access the data history screen
Click the Blood Pressure Measurement symbol to view your blood pressure data history.
Your blood pressure history is displayed in a chart for easy comparison.
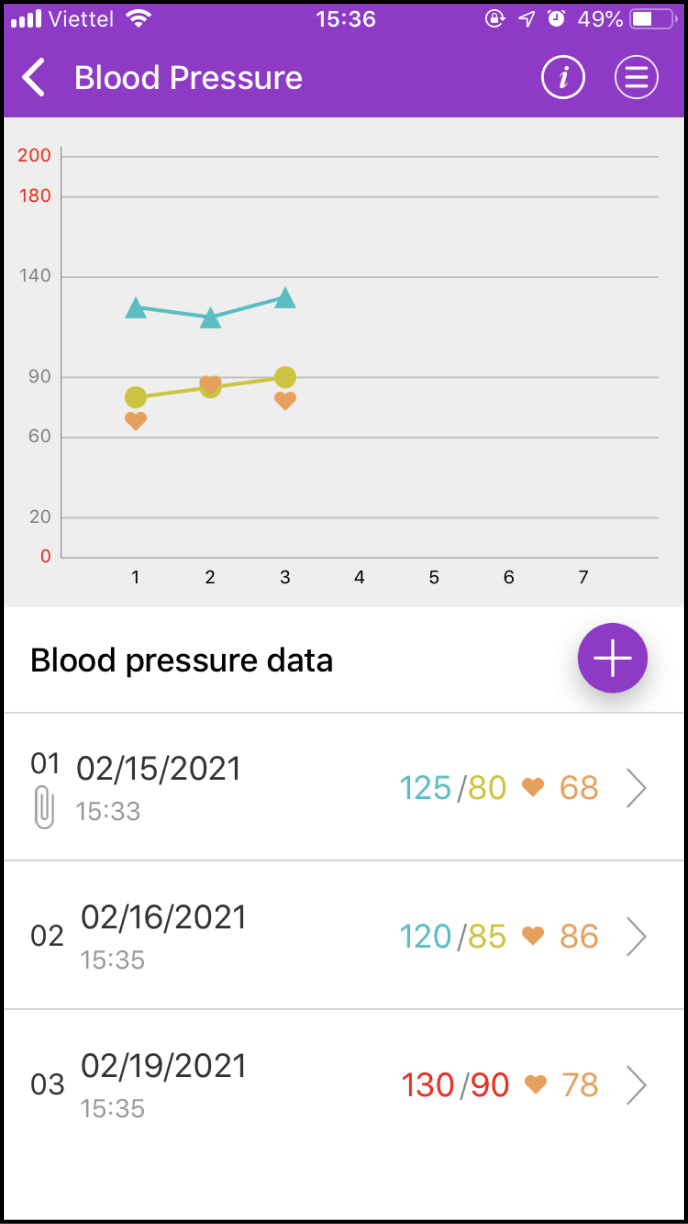
2-2. Details about one measurement
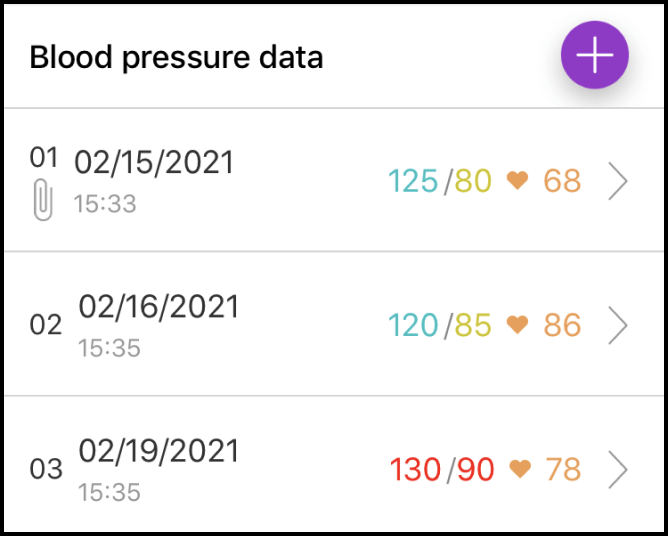
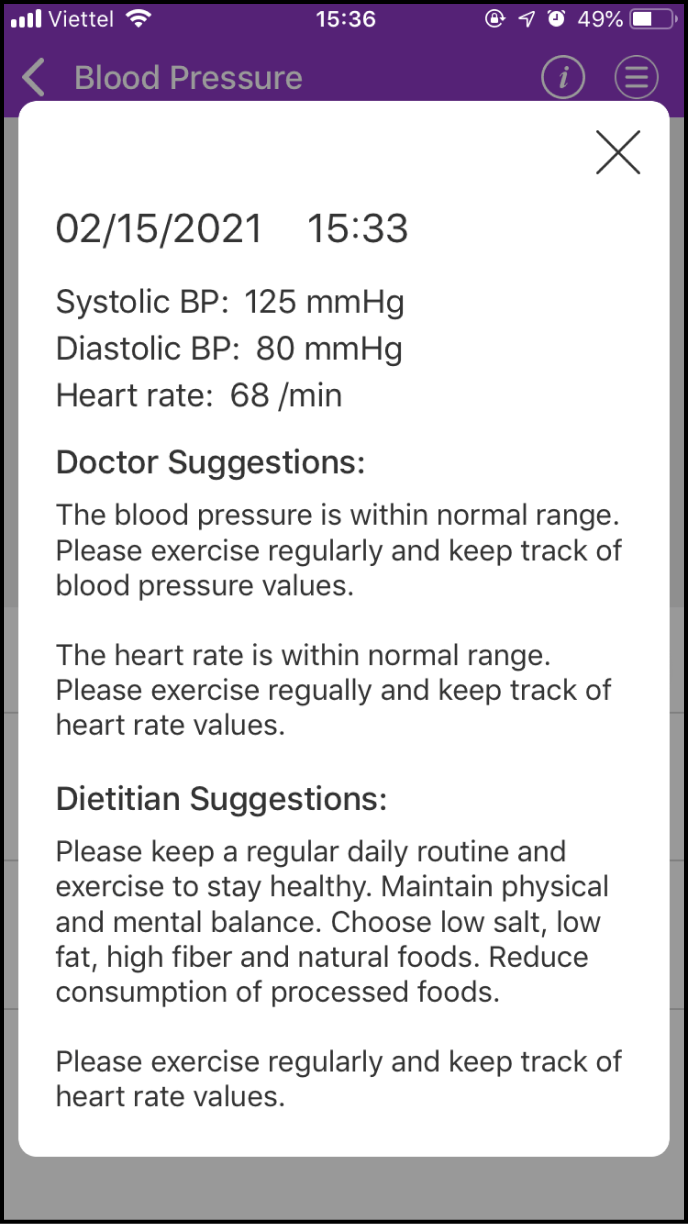
Below the chart, you will find details about the measurement. Select the measurement you want to view and click > to see its details, including the Expert's health suggestions.
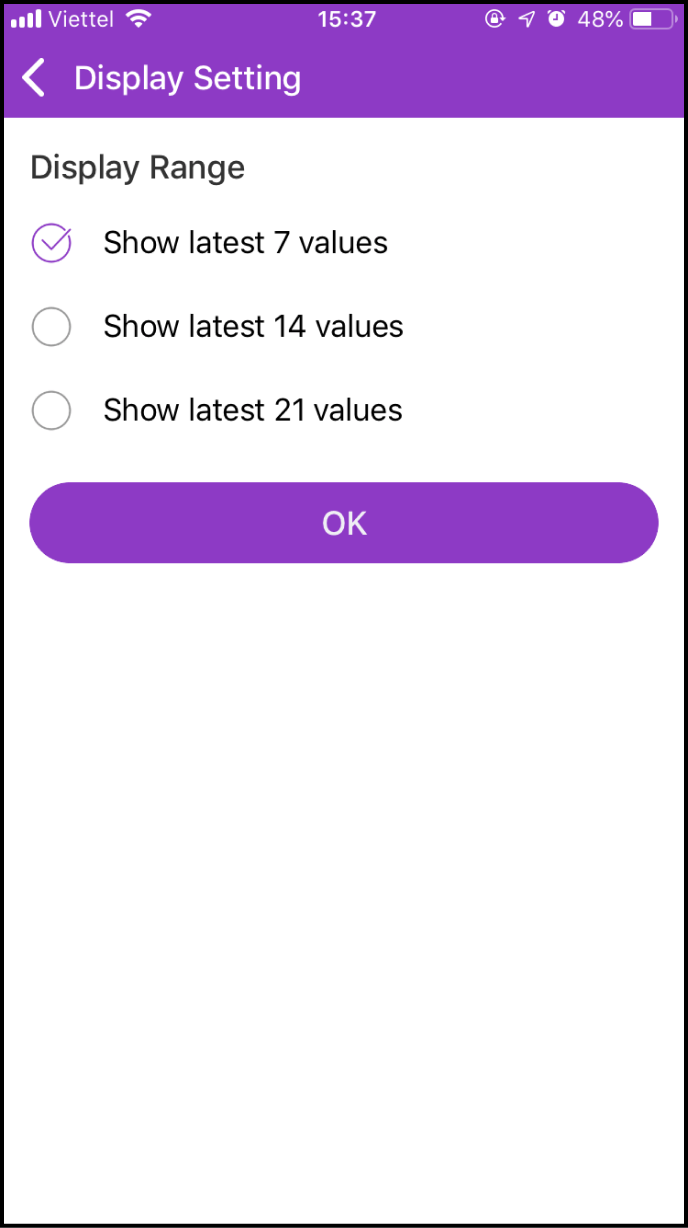
2-3. Setting up your measurement history search
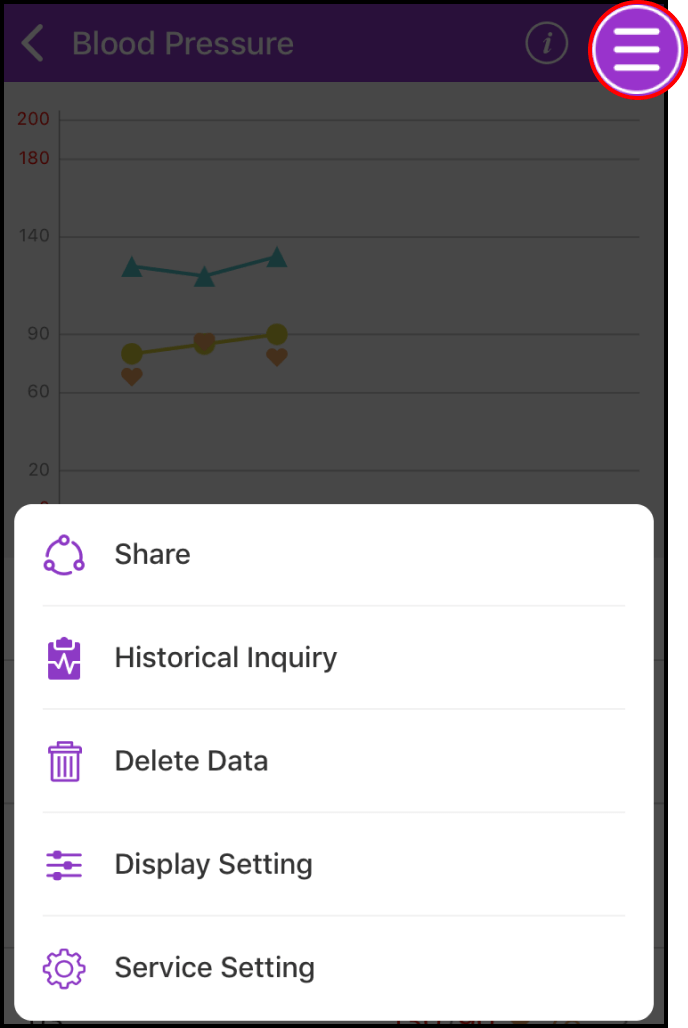
By clicking the Menu icon in the upper right corner of the chart, several options will appear.

History Inquiry lets you set the start and end times to view your measurements within that time period. With "Display Setting," you can set the display range to view the blood pressure measurement values you want to see.
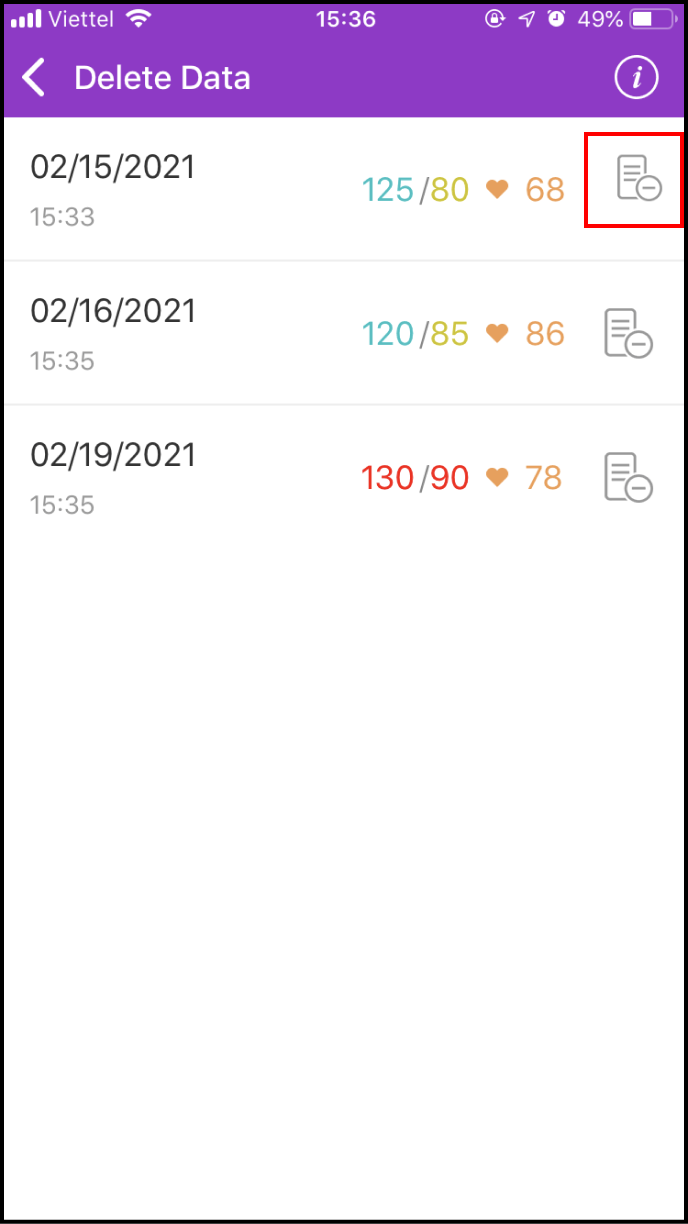
Step 3 Delete Measurement Data
Click the Menu icon in the bottom right corner of the chart, and several options will appear. Choose "Delete Data."
On this screen, click the Delete icon on the right side of the item you want to delete. A confirmation box will appear; click OK to confirm the deletion.